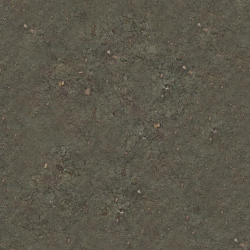
Dry Cracked Dirt (tiling, 2k)
Author:
Monday, October 21, 2024 - 14:58
Art Type:
License(s):
Collections:
This is just a higher res version of (https://opengameart.org/node/7805). Just worked it into being 2k and made a roughness/height to go with it.
See the "Landscape Materials (2k)" collection description if you're curious about my process, recommended use cases, etc.
File(s):


Comments
How did you make a higher resolution texture from a lower resolution texture?
Just takes work. Generally I start by copy-pasting the texture side-to-side until it fills the target resolution, then go to work with the patch/healing/whatever-your-tool-calls-it brush to shift details around and break up tilings. Then usually you hit the limits of the lower resolution detail and want bigger details, at which point you pull in a scaled-up version of the original texture. I just grow the canvas and throw it to the side. Then I fix that scaled-up texture as best I can for making it not look totally jaggy, then keep going with the patch brush, just now transfering details over from the scaled up chunk. The patch brush works by kinda munging the data around anyways, so you can get away with a crappier up-rezzed source here than you'd expect.
For the roughness and height, you generally take the above and shove it to B&W and then play a lot with levels and cutoffs and adjustments until it does what you want.
(then you just generate a normal map from the heightmap, but didn't do that here cus my current aesthetic doesn't really want for normal maps)
All of this is, essentially, the same as the older school process of overlapping your canvas with scaled up / scaled down versions of the same texture to create variance. Just way more powerful and art-directable. Though I do still do the simple layer-overlay approach if what I'm working with amounts to cloud noise.
Nice. I think I might be able to follow those steps to enhance some tiling textures I have. Thank you for sharing! :)
Happy to help!
Oh, and when it comes to making the result tile, you'll also want to use the Offset / Affine Transform / whatever it's called to loop your texture around 50% in both directions. Basically put the edges in the center. Even if you started with a tiling texture, and the result will technically tile after you work it over, a lack of detailing along the edges will still look like seaming. So basically do the same process to noise up the edges too, then affine/offset it back 50% again to make sure you didn't add any extra edges while you were doing that, then you're probably done!